
Lately I have been swooning over some footwear trends. I was inspired by these two heels by Kate Spade:
The "Charm" Heels retail for $328

The "Grande" Bow Heels retail for $598

Obviously my wallet could not handle paying for both of these shoes... so I knew there had to be a better way. So viola! A DIY project was born that incorporated my favorite elements of both of these statement-making pumps! Especially because I have a christmas party coming up, I knew it was time to get craftin'!
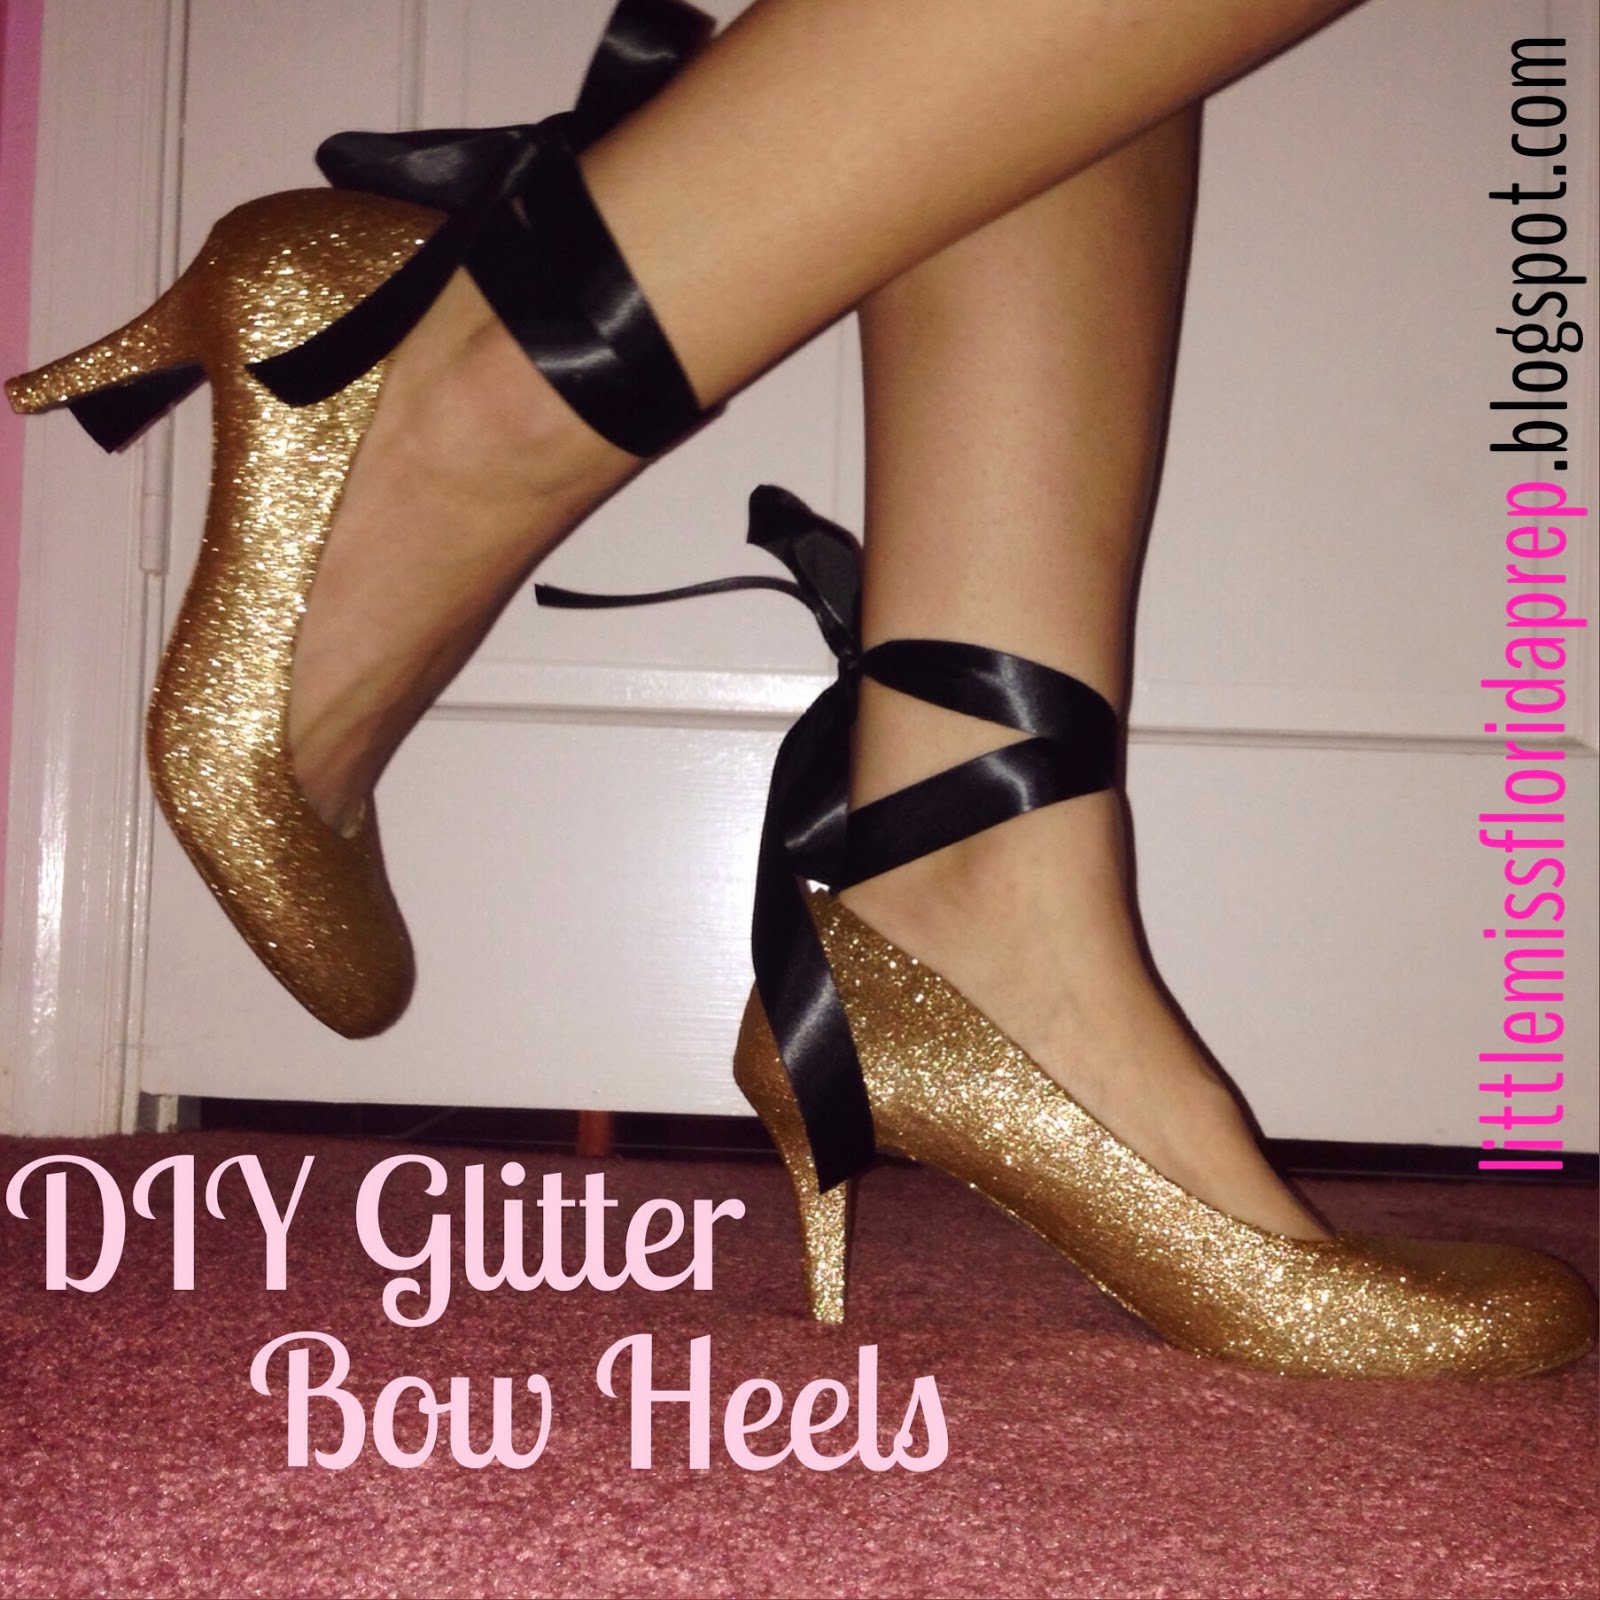
DIY Glitter Bow Heels
What You'll Need

- 8.5 feet ribbon (a satin-like fabric is best!)
- Mod Podge
- Extra fine Glitter in color of your choice (it is crucial that you don't use just any glitter you may find - you can find the kind I used here)
- Scissors
- Hot glue gun
- Shoes (a leather-like or patent fabric is best, this project can be done on any type of shoe - not just heels! I got my shoes on sale for $21 from Payless)
- Paint brush
- Plastic disposable cup
- Plastic disposable knife (or whatever else you'd like to use for stirring)
How It's Done
1. Prepare the Mod Podge:

Pour some of the Mod Podge into the cup. It's always better to use less, because you can always make more! Then add your glitter. I suggest at first that you add an amount which looks about equal to how much Mod Podge you have. Then mix. Continue adding the glitter until the mixture reaches the consistency of a thick paste, it should look like this:

2. Start Painting:

Using the brush, paint the glitter mixture onto the shoe. Make sure to coat it evenly and also be careful to smooth over any lumps that may form. It is ok if some of the color of the shoe is showing through after the first coat. Allow the Mod Podge time to dry, and then add a second coat.
3. No Fear:

The wet mixture looks strange and you may think that you've done something wrong and that your shoes will turn out terribly. Don't worry! When the mixture dries it will become fabulous glittered perfection. The color is much more dull when wet.
4. Put A Bow On It:

Now it's time to add the ankle strap/bow! Cut two strips that are 4 feet (you may have to make this longer or shorter depending on the width of your ankle or how large you want the bow to be). Also cut two smaller strips that are about 4 inches each. Find the middle of one of your long strips, and fold the smaller strip over it. Glue in place with the glue gun.

Make sure if your ribbon has a "side" which you want facing outward, you glue that on the outside when you fold over the small strip.
5. Put It All Together:

Glue this strip into the inside back of the heel. Once again, make sure if your ribbon has a "side" that you want facing out, you glue it accordingly. You should glue the strip so that the full width of the long ribbon is exposed like this:

6. Voila!

Now you're all done! Tie those beauties on and strut your stuff! Be ready for all of the compliments... you may not be able to handle it. Also, because the bows were glued on, if you should decide later that you don't want them you can just peel them off!
Where will you wear your glitter bow heels?
XO,

Perfectly pent content material , appreciate it for entropy. check my blog
ReplyDelete